Areas That Need Insulation

Home insulation is an important part of your house and a properly as well as adequately insulated house is essential not only to save energy cost and meeting energy standards but also the occupants in the house can live comfortably. With that being said even though home insulation is important, not every part of the house requires insulation. To find out which area or part of your home requires insulation, read on. The following paragraphs describe a couple of do-it-yourself (diy) steps in which you can take to easily determine the area or parts of your house that requires adequate insulation.

Basically, the following areas of your house are the area or parts of your house that requires home insulation. You can refer to the diagram below to determine where to insulate. 

1 Ceilings below an unheated area.

2 “Knee” walls of a finished attic level room.

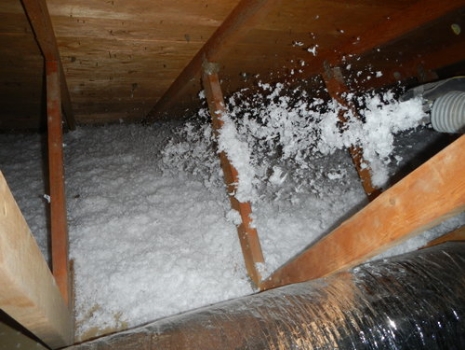
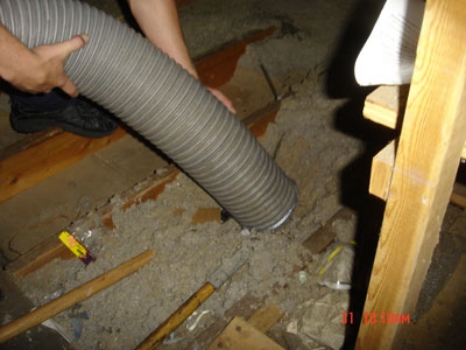
3 Floor of a crawl attic.

4 The sloping portion of the roof in a finished attic. Leave a airspace between insulation and roof.
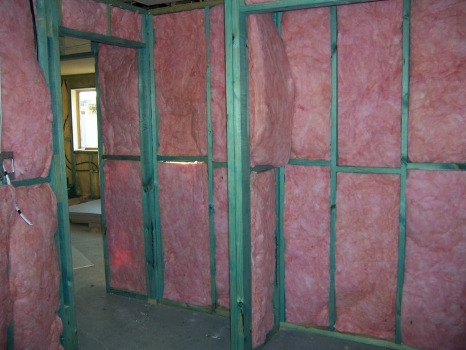
5 Exterior walls.

6 Floor above cold crawl spaces. Floors above a porch or an unheated garage.

7 Walls of a heated basement.

In addition to the need for insulation of the building shell (exterior walls, ceilings, and floors), all hot-water pipes and heating as well as cooling ducts that pass through unheated portions of the house (such as crawl space, garage, or unfinished attic) must be insulated. Most houses usually have no more than 1 or 2 inches of insulation wrapped around ducts in unheated areas. Because of increasing fuel costs, this is considered minimal for most areas, and additional insulation can usually be justified. Check the condition of the insulation. Are there any loose, torn, or missing sections? Also, if there are any exposed duct joints, check them to see if they are sealed tightly. When the ducts are used exclusively for air conditioning or serve a dual function (such as heating and air conditioning), the outside of the insulation should be covered with a vapor barrier to prevent condensation. A vapor barrier, however, is not needed on ducts used only for heating. If there is a vapor barrier on the ducts, check its condition. Look for torn and missing section. All vapor-barrier joints must be tightly sealed.

If the domestic hot water is produced in a tank-type water heater located in an unheated area, the tank should be covered with an insulation jacket. These jackets can be purchased in most building-supply or hardware stores. Although tank-type water heaters are normally insulated by the manufacturer, by installing an outer insulation jacket, you will further reduce heat loss and thereby minimize the energy needed to maintain the desired water temperature. The temperature of the hot water should not exceed 140ºF. Temperatures in excess of 140ºF are not only wasteful of energy but will also shorten the life of the water heater.

Simply put, all the exterior walls, floors and ceiling that have contacts with unheated areas such as attic, garage, crawl space and basement requires insulation. Other than the structure of your house that requires insulation, the water pipes, air conditioning ducts as well as water heater requires proper insulation as well to reduce heat loss.

Draft-Proofing Your Electrical Outlets

The first rule in lowering your heating bill is to prevent cold air from getting into your house. We do this, of course, with insulated walls, ceilings, and floors. What happens, however, when you make a hole in that wall or ceiling or floor for some particular reason?

That's when you install something to fill up that hole like a window or door or vent. All of these are specially designed to prevent air infiltration, of course. Even then, you need to add weatherstripping and caulking to ensure that no cracks remain.

There's another category of holes we make in walls, where these holes don't go all the way through — these holes are for electrical outlets and light switches. The typical exterior wall in a house is made with 2"x4" or 2"x6" studs with sheathing and siding on the outside and sheetrock on the inside. Between the studs should be as much batt insulation as will fit snugly. Electrical outlets are then installed in a plastic box about 3" deep that is either shoved or cut into the insulation. Anyone who has worked with an electrician can tell you that electricians are not worried about insulation. For electrical outlets on exterior walls, there is typically little or even no insulation between the outdoors and the inside of the house.

Renovation Tax Credit Stimulus

Effective Jan. 27, any Canadian who spends money on home renovations will be eligible to receive up to $1,350 in tax relief, thanks to the new Home Renovation Tax Credit proposed in the Government's Economic Action Plan.

"Each time a Canadian invests in home renovations, they are helping to create jobs in construction and building supplies in their own community," said the Honourable Lisa Raitt, Minister of Natural Resources Canada. "By providing an incentive for Canadians to invest in their homes, we are also encouraging them to invest in local jobs."

To highlight the kind of projects that will be eligible under this plan, the Minister visited a Victoria-area home renovation site and met with a local contractor who will be better able to protect and create jobs thanks to the additional home renovation projects that will be encouraged through this tax credit.

The Home Renovation Tax Credit will provide a one-year, temporary 15% income tax credit on eligible home renovation expenditures for work performed, or goods acquired, between January 27, 2009 and February 1, 2010. The credit may be claimed on eligible expenditures exceeding $1,000 but not more than $10,000.

The Home Renovation Tax Credit is one of several initiatives designed to help homeowners and homebuyers contained within the Government's Economic Action Plan. Budget 2009 also announced $300 million over two years for homeowners looking to make their homes more energy efficient.

This government is taking steps to help Canadians control their energy costs and keep more money in their pockets. Minister Raitt also announced today the Government of Canada has reintroduced legislation to modernize the Energy Efficiency Act, and has made a series of improvements to Canada's Energy Efficiency Regulations. By 2010, the regulatory changes alone will allow Canadians to save $530 million in energy costs.

Before homeowners, homebuyers, and local construction and building supply workers can benefit from these new initiatives, Parliament must pass the 2009-2010 Federal Budget.

Why Upgrade Your Insulation

When it comes to energy-efficient renovations, an often overlooked home upgrade is insulation. While replacement windows and high-efficiency furnaces receive much of the attention, it’s important to remember that improving the attic, wall and basement insulation of your home can provide a lot of value for your investment!

Recently, we completed a home upgrade in Kelowna, BC, that offered an opportunity to showcase the process of upgrading insulation. Typical of older homes, this property has very little to no insulation. Built in the 1940’s, this bungalow style home with raised crawl space contains a tar paper air barrier, ship lap construction with lath and plaster walls. The only insulation to be found is wood shavings in the walls and ceilings

To start, we upgraded the insulation in the crawl space. Generally homeowners don’t think of their basement or crawl space as a prime source of heat loss, yet basements can account for 20 to 30 per cent of a home’s total.

The steps we’ve taken to insulate the basement are:

1) A moisture barrier (polyethylene 6-ml) is installed on the cold side of your insulation and serves to protect the insulation from water and moisture coming in from the outside wall.

2) Install batt insulation between the studs next to the moisture barrier.

3) A vapour barrier is installed on the warm side of the insulation. It serves to keep moisture in your home from penetrating into the wall cavity.

4) Wall covering such as gyproc or wallboard is used to finish the wall.

Next up, we’re insulating the walls using blown-in insulation. Blown-in insulation should be done by an experienced contractor since it requires the use of special pressurized equipment, which significantly reduces the amount of settling of loose-fill insulation after installation. The contractor must ensure each cavity is filled with insulation. The steps we’ve taken to insulate the walls are:

1) Identifying cross blocking (fire-stops) in the walls, and ensuring that holes are drilled to give access to all spaces in the walls.

2) Filling hollow corner posts, overhangs and other odd spots

3) After final inspection, making sure the drill holes are filled with cork and high-quality exterior caulking.

Finally, we turned our attention to the attic insulation which is typically the easiest and most cost effective way to make your home more efficient. The amount of insulation you can install in your attic is determined by the size of the joists and whether or not your attic has a floor. A settle density of R-32 to R-40 is preferable in most instances, but is not always possible. In the case of the Kelowna residence, we used loose-fill insulation and the steps we’ve taken to complete the attic insulation are:

1) Loose-fill insulation is poured on top of the air barrier and vapor barrier. It’s leveled out to maintain an even depth.

2) Pour the insulation to fill all nooks and crannies.

3) At the eaves, we take care to keep the insulation from blocking the ventilation of from disappearing into the eaves space.

4) We’re careful not to insulate to closely around flue pipes and gas vents

5) We make sure to seal the attic hatch.

In closing, keeping your home heated is difficult, particularly in Canada, where we live in a colder climate. Remember, heating costs account for more than 50 per cent of the energy used in your home, therefore, adding insulation will improve the comfort of your house and give you more value for your energy dollar.